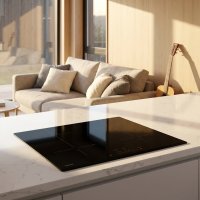
Welcome, home chefs and kitchen renovators! As your trusted expert from Gooau.com, with over 15 years in the world of induction hobs, I’m thrilled to guide you through the process of installing an induction hob. It’s a journey that blends careful planning with precise execution, transforming your kitchen into a hub of modern culinary innovation. While some aspects of the installation are manageable for the seasoned DIY enthusiast, it’s absolutely crucial to understand where professional expertise becomes non-negotiable, particularly when it comes to electrical connections. Our goal at Gooau is to empower you with the knowledge to approach this task confidently, ensuring safety, efficiency, and a perfect fit for your new kitchen centerpiece.
The Allure of Induction: Why Make the Switch?
Before we dive into the nuts and bolts of installing an induction hob, let’s appreciate why these appliances have become the gold standard in modern kitchens. Induction hobs offer unparalleled benefits: they heat incredibly fast, provide precise temperature control that rivals gas, are remarkably energy-efficient, and boast superior safety features since the hob surface itself doesn’t get dangerously hot. This combination of performance and peace of mind makes installing an induction hob a worthwhile upgrade for any home.
Crucial Pre-Installation Checklist: Getting Everything Right
A successful installation starts long before you even unbox your new appliance. Careful preparation is the bedrock of a smooth and safe process.
Electrical Readiness: A Job for the Pros
This is arguably the most critical aspect of induction hob installation, and it’s where I cannot stress enough the importance of professional involvement. Induction hobs are powerful appliances that demand a specific electrical setup. They typically require a dedicated 220V-240V circuit, and depending on the model, this often translates to a 30-50 amp circuit breaker. Some models might even specifically call for a 32A circuit breaker.
“Consult your electrician about your household’s electrical loading capacity,” advises a Bosch UK guide. This isn’t just a suggestion; it’s a vital safety measure. An existing circuit might not be sufficient, necessitating a switchboard upgrade or, in rare cases for larger commercial-sized hobs, even an upgrade to a three-phase supply.
Furthermore, an isolation switch, which allows you to completely cut power to the cooktop, must be installed within two meters of the induction hob. This is an essential safety feature for maintenance or emergencies. Legally, any handling of electrical wiring or upgrades requires a licensed electrician. Attempting to wire an induction hob yourself without proper certification and experience can lead to severe electrical hazards, appliance damage, and could even void your home insurance.
Precision Measurements: Your Countertop’s New Resident
|
Our Picks for the Best Induction Hob in 2026
As an Amazon Associate I earn from qualifying purchases.
|
||
| Num | Product | Action |
|---|---|---|
| 1 | ChangBERT Induction Cooktop, Commercial Grade Portable Cooker, Large 8” Heating Coil, Premium Stainless Steel Countertop Burner with NSF Certified, 10 Hours Timer Powerful 1800W Professional Hot Plate |

|
| 2 | LỖI |
|
| 3 | Duxtop Professional Portable Induction Cooktop, Commercial Range Countertop Burner, 1800 Watts Induction Burner with Sensor Touch and LCD Screen, P961LS/BT-C35-D, Silver/Black |
|
| 4 | AMZCHEF Portable-Induction-Cooktop: 74 Temperature Levels Induction Burner with Digital Probe, 1800W Countertop Burner with 20 Power Levels, 6.5\" Heating Coil, Low Noise Electric Cooktops with Timer |
|
| 5 | Nuwave Flex Precision Induction Cooktop, 10.25” Shatter-Proof Ceramic Glass, 6.5” Heating Coil, 45 Temps from 100°F to 500°F, 3 Wattage Settings 600, 900 & 1300 Watts, Black |
|
| 6 | AMZCHEF Portable Induction Cooktop 20 Temperature & Power Levels, 1800W Induction Stove Burner with 6.8\" Heating Coil, Low Noise Hot Plate Single Electric Cooktops Countertop Stove with Timer |
|
| 7 | Portable Induction Cooktop 20 Temperature & Power Levels,1800W Single Burner Electric Cooktop with 6.8 inch Heating Coil,Low Noise Hot Plate with Timer |
|
| 8 | Duxtop 1800W Portable Induction Cooktop Countertop Burner, Gold 8100MC/BT-180G3 |
|
| 9 | Mueller RapidTherm Portable Induction Cooktop Hot Plate Countertop Burner 1800W, 8 Temp Levels, Timer, Auto-Shut-Off, Touch Panel, LED Display, Auto Pot Detection, Child Safety Lock, 4 Preset Programs |
|
| 10 | Duxtop Portable Induction Cooktop Burner, Induction Hot Plate with LCD Sensor Touch 1800 Watts, Silver 9600LS/BT-200DZ |
|
The physical fit of your induction hob into your countertop is another area demanding meticulous attention. You’ll need to precisely measure the dimensions of your induction hob and, if you’re replacing an old one, confirm the existing cutout dimensions. If you’re creating a new opening, mark the installation area on your countertop with absolute accuracy, using a level to ensure straight lines.
Manufacturers provide specific “cut-out requirements” in their manuals, which are non-negotiable. For instance, a common recommendation is a 760 mm by 490 mm cutout, with a tolerance of +2 mm. Crucially, induction hobs require adequate ventilation to prevent overheating and ensure efficient operation. This means leaving a recommended gap, often 5-10mm, around the edges of the hob for proper airflow. Additionally, there should be a minimum clearance below the unit, typically around 40mm, and the area under the countertop must be clear of obstructions.
Essential Tools and Materials
Having the right tools on hand will streamline the installation process. Here’s a comprehensive list of what you’ll likely need for the physical installation, as outlined by Karinear Appliances:
- Screwdriver (various types)
- Adjustable wrench
- Electrical tape (for the electrician)
- Wire cutters (for the electrician)
- Wire nuts (for the electrician)
- Level
- Drill and appropriate bits (e.g., for jigsaw pilot holes)
- Jigsaw (if cutting a new opening)
- Measuring tape
- Silicone caulk (for sealing the edges)
- Mounting brackets or screws (these usually come with the hob)
- Electrical wire (your electrician will specify this, ensuring it matches hob specifications)
- Circuit breaker (if required, installed by an electrician)
Replacing a Gas Hob? Don’t Forget the Gas Line
If you are upgrading from a gas hob to an induction model, you must ensure that all gas connections are safely capped off by a qualified gas-safe engineer. This is a critical safety step to prevent gas leaks and should never be attempted by an untrained individual [cite: 5 in initial search].
Step-by-Step Physical Installation: What You Can Do
Once all preparations are complete and, importantly, the electrical readiness has been assessed by a professional, you can proceed with the physical placement of your induction hob.
Step 1: Prioritize Safety – Disconnect the Power!
Before any work begins, even before touching the old appliance or starting any cuts, switch off the main power supply to your kitchen at the consumer unit (fuse box). This prevents accidental electrical shocks or short circuits. Confirm the power is off using a voltage tester.
Step 2: Prepare and Clean the Countertop Cutout
If you are replacing an old hob, carefully remove it. If you are creating a new opening, use your drill and jigsaw to cut along your accurately marked lines, taking your time for a precise cut. After any cutting, clear away all shavings and debris from the niche. Ensure the cutout is clean, dry, and matches the hob’s dimensions.
Step 3: Apply the Sealing Strip (If Provided)
Many induction hobs come with a self-adhesive sealing strip or gasket that needs to be applied around the edge of the cutout or the underside of the hob. This strip creates a barrier against spills and moisture, protecting your countertop from water damage. Carefully apply it according to the manufacturer’s instructions.
Step 4: Gently Position and Secure the Hob
With the cutout prepared and the sealing strip in place, carefully lower the induction hob into the opening. Make sure to feed any electrical cables through the cutout first [cite: 3 in initial search]. Gently guide it into position, ensuring it rests evenly and is level and flush with the countertop surface. Once positioned, use the provided mounting brackets or screws to secure the hob firmly to the countertop from underneath. This prevents any movement during use.
Step 5: Crucial Electrical Connection – Engage a Licensed Electrician!
This is where you absolutely must step back and let a licensed professional take over. As mentioned, induction hobs require a dedicated circuit, and the wiring process can be complex. Your electrician will connect the electrical wires from the induction hob to your home’s electrical supply, following the manufacturer’s specific instructions and all local electrical codes. They will ensure proper grounding and secure all connections safely. While you might see references to matching wire colors (brown with brown, blue with blue, and yellow/green with yellow/green), this is information for the qualified professional, not for DIY electrical work [cite: 4 in initial search].
Step 6: Final Visual Checks and Sealing
Once the electrician has completed the wiring and confirmed everything is safe, remove any protective films from the hob surface. You can then apply a thin bead of silicone caulk around the outer edge of the hob where it meets the countertop. This provides an additional seal against spills, but be careful not to apply it under the lip of the hob, which could hinder future removal if needed [cite: 3 in initial search]. Finally, clean the hob surface and surrounding worktop.
Common Hiccups and Troubleshooting Tips
Even with careful planning, minor issues can arise. Here are a few common installation hurdles and how to address them:
- Uneven Heating: If you notice that your cookware isn’t heating evenly, first check that it’s induction-compatible and has a flat base. Ensure the pan is properly aligned with the heating elements on the hob.
- No Power: If your hob isn’t receiving power after installation, do not attempt to fix the wiring yourself. First, check your circuit breaker to see if it has tripped. If it has, reset it. If the issue persists or the breaker continues to trip, contact your licensed electrician immediately.
- Error Codes: Modern induction hobs often display error codes if there’s an issue. Always consult your manufacturer’s manual to identify the specific code and follow the recommended troubleshooting steps.
- Overheating: If your induction hob seems to be overheating, ensure that the ventilation beneath and around the hob is not blocked. Clear any debris or obstructions to allow proper airflow.
Expert Spotlight: The Unseen Value of Professional Installation
At Gooau, we’ve seen countless installations over the years, and one truth consistently emerges: the importance of a skilled professional for the electrical work.
“While the physical placement of an induction hob might seem straightforward, the electrical connection is where expertise truly shines. An improper hookup isn’t just a minor inconvenience; it’s a significant safety hazard that can compromise your home’s electrical system, impact appliance performance, and even void your warranty. Always invest in a certified professional for this critical step.” – Eleanor Vance, Master Electrician and Kitchen Appliance Specialist at Gooau.
This emphasizes that while you can handle the physical setup, the electrical heart of your induction hob demands qualified hands.
Frequently Asked Questions (FAQ)
Can I install an induction hob myself?
You can typically handle the physical placement and securing of an induction hob into the countertop. However, the electrical connection is a complex and potentially dangerous task that should always be performed by a qualified, licensed electrician to ensure safety and compliance with electrical codes.
What are the specific electrical requirements for an induction hob?
Induction hobs generally require a dedicated 220V-240V circuit with sufficient amperage, often between 30 to 50 amps, and sometimes a specific 32A circuit breaker. Your home’s electrical system may need an upgrade to accommodate these demands.
How much ventilation space does an induction hob need?
Adequate ventilation is crucial to prevent overheating. Most manufacturers recommend a gap of 5-10mm around the edges of the hob and a minimum clearance of around 40mm below the unit. Ensure the space beneath the countertop is clear for proper airflow.
What if my countertop cutout is too big or too small?
If the cutout is too small, it will need to be carefully enlarged according to the manufacturer’s specifications. If it’s too large, it may compromise the hob’s stability and ventilation, potentially requiring a professional to modify the countertop or install an adapter frame. Always aim for precise measurements during preparation.
Do I need special pots and pans for induction cooking?
Yes, induction hobs only work with cookware that has a magnetic base. To check if your existing pots and pans are compatible, simply hold a magnet to the bottom – if it sticks, you’re good to go! Cast iron and most stainless steel cookware are usually induction-compatible.
Conclusion
Installing an induction hob can truly elevate your cooking experience, bringing efficiency, precision, and safety to your kitchen. By meticulously preparing your space, understanding the critical electrical requirements, and knowing when to call in the experts, you can ensure a successful and long-lasting installation. While you can confidently manage the physical integration into your countertop, remember that the electrical hookup is a specialized task best left to a licensed electrician. Prioritizing safety and adhering to manufacturer guidelines will allow you to enjoy your new induction hob with complete peace of mind. Get ready to cook up some magic!
Cooking gear we tested in our own kitchens
Free PDF — preheat times measured on 10 popular air fryers.